Bold, Bright, Beautiful: Celebrating with Pride Nails

Pride month is finally here, and we’re all about celebrating. And while Pride nail designs are one of our small ways of showing our allyship, it’s the tiniest drop in a big ocean. Combined with each of these beautiful designs, we like to boost our support by uplifting the voices of our LGBTQIA+ community - through learning, listening and how we live. But while the celebrations are underway? Spread the love with these Pride nail ideas, this month and every month.
How do you paint your nails for pride?
While we can make our way to our local nail salon and let the masters work their magic, those of us who love to create can do so at home. The best part? All you need are some colourful nail paints, a little glitter, and some decorative nail tools to help. So get celebrating: here are some of our favourite Pride nail looks to recreate at home - plus everything you need to do it.
Get the look:
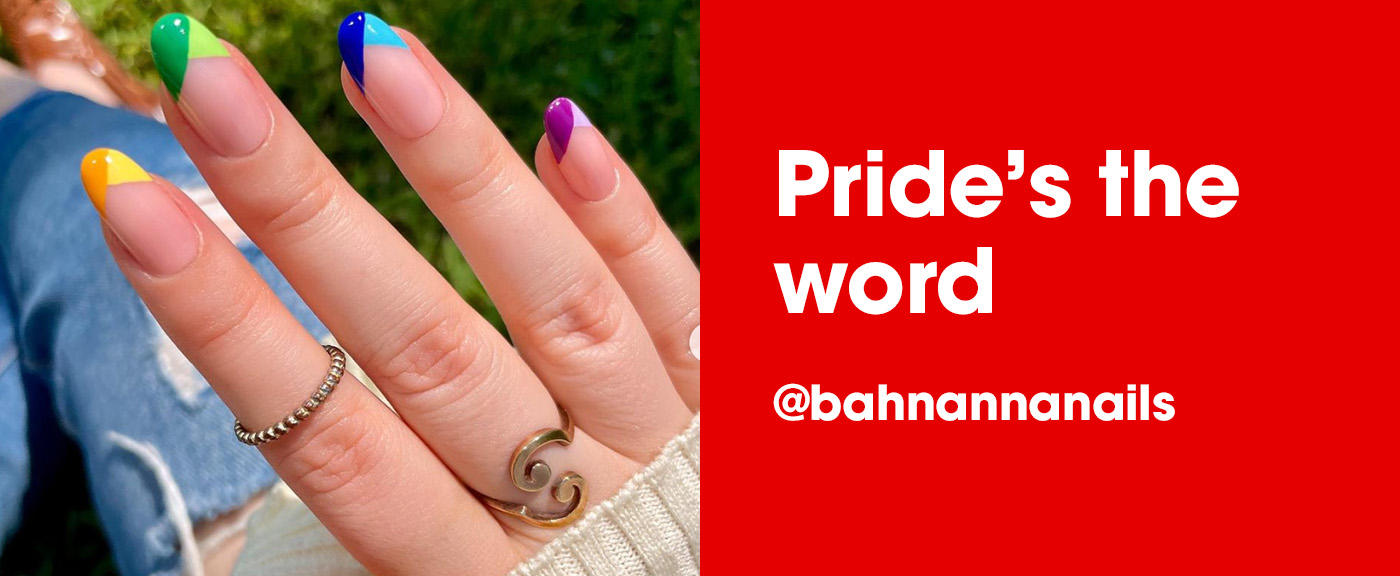
From LGBTQIA+ nail artist, @bahnannanails (She/They), comes a minimalist manicure we’ll be sporting all year long:
Step one: Prime your hands with a hydrating hand cream, like this cult favourite from L’Occitane.
Step two: Then go in with a clear base coat to set the stage for these elegant but simple pride nails.
Step three: Using a thin nail brush, paint over one corner of your nails diagonally with peach, yellow, apple green, light blue and lilac accordingly. Then, mirror on the other side of your nail with corresponding darker colours, like red, orange, green, cobalt and violet.
Step four: Select a shine-boosting top coat to bring the look together, then allow it to dry for at least fifteen minutes. Or if you’d like a longer-lasting, cleaner look, you can try this entire manicure with Mylee’s at-home gel kit.
Get the look:
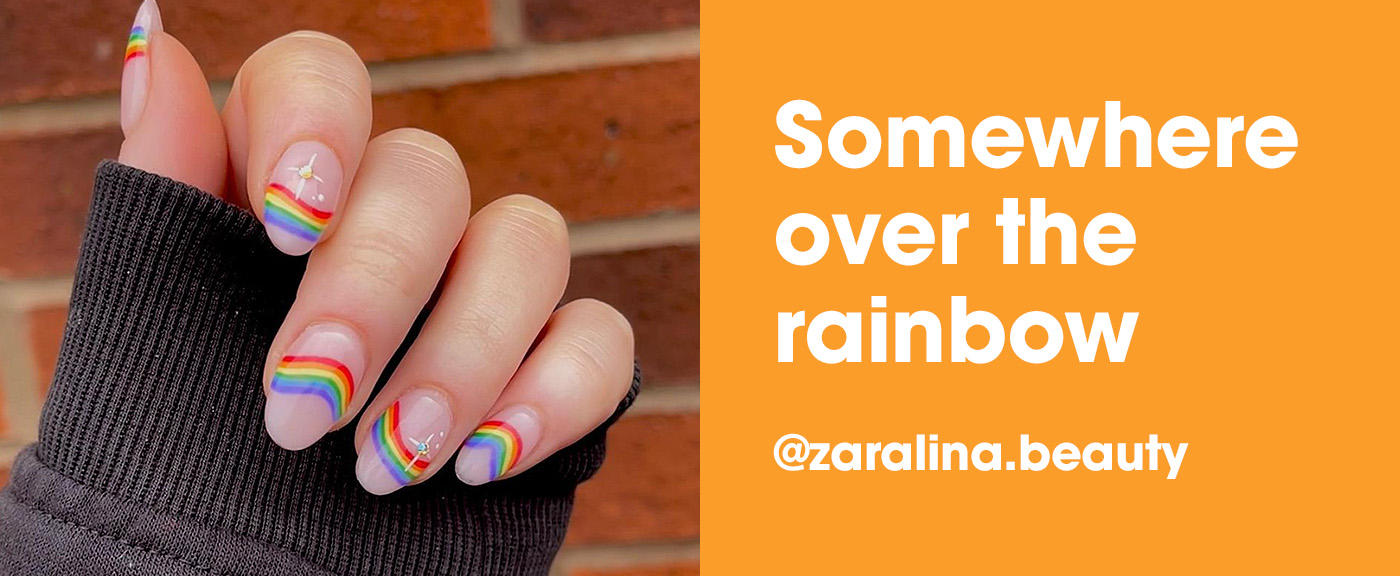
As always, rainbow manicures are one of the most popular Pride nail looks going - just like this one from @zaralina.beauty. Inspired? Here’s our very own hot take:
Step one: Prep your nails with a four-step nail buffer, which buffs, smooths and shines. Follow with a gel nail coat and set under a LED light.
Step two: For longevity and vibrancy, this look is best created with a set of colourful gel polishes. When you’re happy with your colours, begin painting wavy rainbow stripes across each nail. Remember, you can mix colours together to create the perfect shade. Then, set under a LED light.
Step three: On one or two nails, lightly paint on some white lines to signify a star, set, then follow a gel topcoat once again.
Step four: Finish with a gem of your choice for extra sparkle, keeping it in place with a dot of topcoat gel before your final setting.
Get the look:
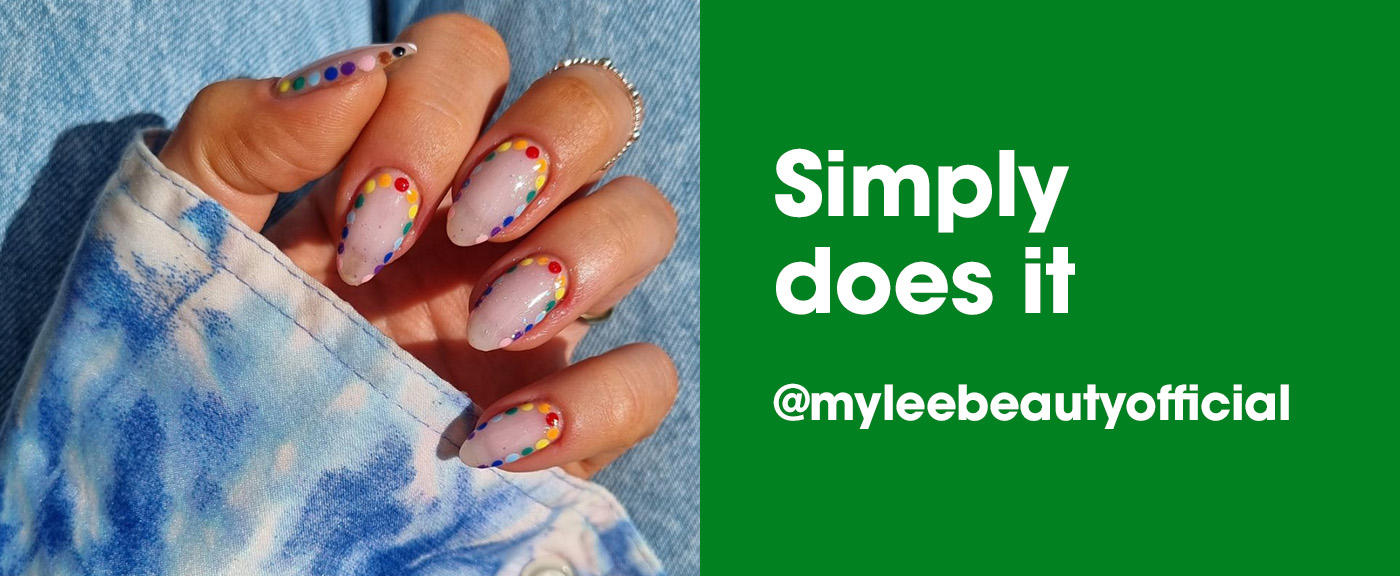
Not all rainbows look the same, and that’s why we love them; this super elegant dotwork showcased on @myleebeautyofficial shows us exactly that. Using either gel or classic polish, here’s how we recreate the look:
Step one: After buffing your nails and moisturising your hands, paint on a layer of base coat and set with Mylee’s much-loved LED light.
Step two: Then, take a pale pink-nude gel shade and paint on a light layer before setting again.
Step three: Using a nail art tool, begin dotting on your rainbow to each nail. Start with one red dot in the centre near your cuticle, and work your way out to violet near the top of your nail.
Step four: Top with a clear coat of gel polish to seal in the rainbow. Our top tip? To keep all your gel essentials in one place, use one of The Flat Lay Co.’s iconic open makeup bags to help - preferably in one of their brightest colours possible.
Get the look:
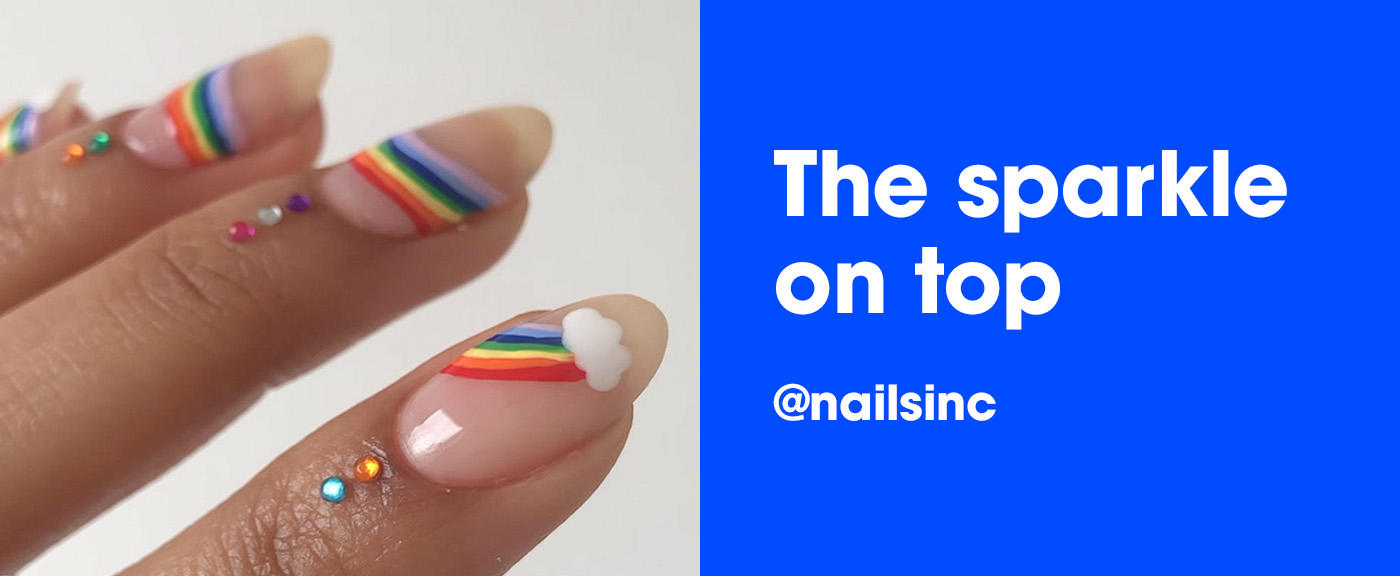
What’s a rainbow without a little extra sparkle? When we’re thinking of how to make a rainbow on your nails stand out, we turn to @nailsinc. For inspo:
Step one: Nails looking a little worse for wear? Spend a few minutes massaging a cuticle oil into your fingers to help repair any damage. Then wipe off with nail polish remover before your artistry begins.
Step two:Give your nails a stronger, longer lasting base with at least one layer of your chosen base coat, leaving time to dry.
Step three: Then using a nail brush, paint a rainbow into the centre of your nail, alternating the angles on each one. Once dry, use an opaque white shade like Under the Covers to paint on a cloud.
Step four: After sealing in with a shiny top coat, it’s time to bring out the glitter. In whatever colour you wish, apply to your cuticle. They might not last the week, but are the perfect manicure addition for when you want to bring a little extra flair to an event.
